Follow these steps to install the beta Mac driver for your printer:
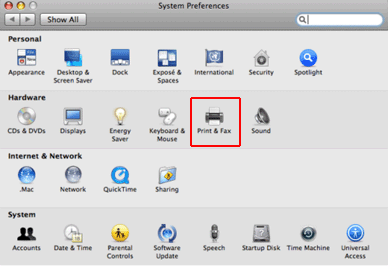
- From the Apple menu, select System Preferences.
- Click Print & Fax.

- Highlight any Epson printers and click the
 button to remove them from the Printers list, then click OK.
- Open the Hard Drive.
- Select Library > Printers.
- Select the folder labeled EPSON and drag it to the trash.
Note: This will remove all installed Epson printer drivers. You’ll need to reinstall any printer drivers that you still need.
- Empty the trash.
- Restart the computer.
- Go to the appropriate Support Printer model page and download the necessary driver for your printer.
- Open the file you downloaded, and follow the on-screen instructions to install the driver software.
- Click Quit when done.
- From the Apple menu, select System Preferences, then click Print & Fax.
Note: If you’re using a USB connection, the printer should automatically appear in the Printers list, indicating that it has been installed. You can skip the remaining steps.
- If you’re using a network connection, click the
 button to add your printer.
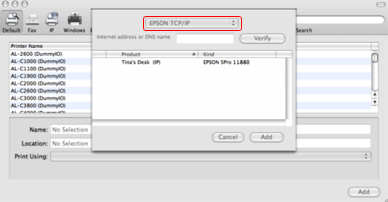
- Click More Printers, select Epson TCP/IP, then select your printer. (The Epson Stylus Pro 11880 appears in the example below, but you’ll see your printer name instead).


Note: If your printer is not displayed, input your printer’s IP address in the Internet address or DNS name field, then click Verify. Your printer should appear on the list. Select your printer, then click Add.