How do I add and assign scan jobs with Document Capture Pro or Document Capture?
-
See below.
Adding and Assigning Scan Jobs with Document Capture Pro - Windows
You can add scan jobs that contain specific scan settings and use the jobs when you scan from your product control panel or the Job Scan option in Document Capture Pro. You can save up to 30 scan jobs.Note: Settings may vary depending on the software version you are using. Click the Help icon in Document Capture Pro at any time for more information.
- Do one of the following to start Document Capture Pro:
- Windows 10: Click
 and select Epson Software > Document Capture Pro.
 - Windows 8.x: Navigate to the Apps screen and select Document Capture Pro.
- Windows (other versions): Click
 or Start, and select All Programs or Programs. Select Epson Software > Document Capture Pro.
- Windows 10: Click
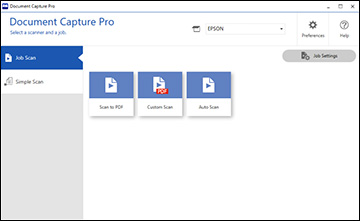
- Select the Job Scan tab. You see a window like this:
- Click the Job Settings button. You see a window like this:

- To add a scan job, click the New Job icon.
- Enter a name for the new job, and select any settings as necessary from the following options:
- Scan: select the size, color, or resolution
- Save: select the file name, file type, or destination folder
- Index: enable the index setting and choose output options for an index file
- Send: select the destination for the scanned file, or choose to email or print the file
- Confirm/Test: select the job button icon and color, choose display settings, and run a test scan if necessary
- Click Save when you are finished. The new job appears in the Job Scan window.
- To assign a scan job to the product control panel, click the Button Assignment icon. You see a screen like this:

- Select the jobs that you want to assign to the product control panel using any of the pull-down menus.
Note: The number of pull-down menus available may vary, depending on your product and any connected options.
- Click OK, then click Back. You can now use the added scan jobs when you scan from the product control panel.
Scanning to a Connected Computer
Adding and Assigning Scan Jobs with Document Capture - Mac
You can add scan jobs that contain specific scan settings and use the jobs when you scan from your product control panel or Document Capture. You can save up to 30 scan jobs.Note: Settings may vary depending on the software version you are using. See the Help menu in Document Capture at any time for more information.
- Start Document Capture on a computer connected to the product.
- Click the
 Manage Job icon from the toolbar at the top of the window. You see a window showing the current scan job list.
 - To add a scan job, click the + icon, enter a name for the new job, select settings as necessary, and click OK. You can now use the new scan job when you scan with Document Capture.
- To assign a scan job to the product control panel, click the
 icon at the bottom of the window and click Event Settings.
 - Select the jobs that you want to assign to the product control panel using any of the pull-down menus.
Note: The number of pull-down menus available may vary, depending on your product and any connected options.
- Click OK, then click OK again. You can now use the added scan jobs when you scan from the product control panel.
- Do one of the following to start Document Capture Pro:
Published: Aug 6, 2020
Was this helpful? Thank you for the feedback!
