A Windows 10 printer driver does not install when I connect my printer to a Windows 10 computer. What should I do?
-
Do the following:
- Turn on your printer and make sure it is connected to your Windows 10 computer.
- Turn on your computer.
- Select
 >
>  .
. - Select Devices > Printers & scanners > Add a printer or scanner.

- Do one of the following:
- If your printer appears in the window, select it and select Add device. Windows installs a driver for your printer, and your printer appears in the Printers & scanners list.
- If your printer does not appear in the window, select The printer that I want isn't listed > Add a local printer or network printer with manual settings > Next. Then do the following:
- Select Use an existing port, and in the drop-down list to the right, select USB001 (Virtual printer port for USB).

- Select Next.
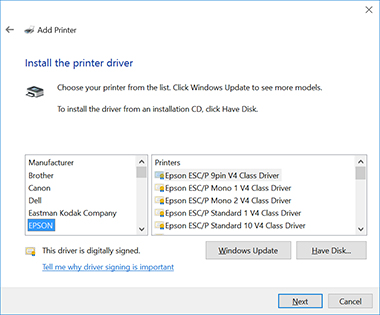
- In the Manufacturer column, select EPSON. In the Printers column, select your printer.

Note: If you do not see your printer, select Windows Update. After Windows has finished updating the list of printers, select Epson in the Manufacturer column and select your printer in the Printers column.
- Select Next.
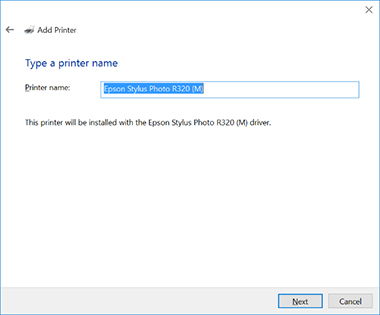
- Modify the printer name, if desired, and select Next to install the printer.

- Select Do not share this printer and select Next.
Note: Others on your network will still be able to find and use the printer after you select this option.
- Select Print a test page to make sure the printer installed correctly.
- Select Close, then Finish.
- Select Use an existing port, and in the drop-down list to the right, select USB001 (Virtual printer port for USB).
Published: Jul 23, 2015
Was this helpful? Thank you for the feedback!