How do I save my scans to a specific folder when using the Scan to PC button?
-
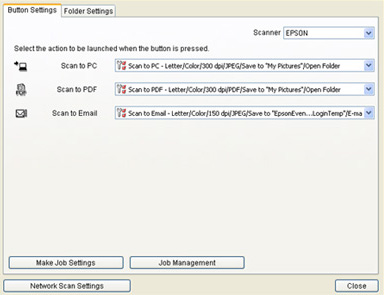
You can save scans to a select destination folder (Documents, Pictures, or Select target folder) by changing the settings in Epson Event Manager.
- Do one of the following:
Windows 8.x: Navigate to the Apps screen and select Event Manager.
Windows (other versions): Click Start or , and select All Programs or Programs > EPSON Software > Event Manager.
Mac OS X: Open Applications > Epson software > Event Manager.
- Select your product in the Scanner drop-down box, then click Make Job Settings.

- Select Scan to PC, select your desired destination folder (Documents, Pictures, or Select target folder) from the Target Folder drop-down box.

Note: To save the scan to a specific folder on your computer, use the Select target folder option. - Click OK, then click Close.
- Do one of the following:
Published: Feb 13, 2014
Was this helpful? Thank you for the feedback!