I see the message Unable to connect to network scanner. Check the scanner, network, and connection settings. What should I do?
-
Do the following:
- Make sure your product is connected to the same wireless or wired network as your computer.
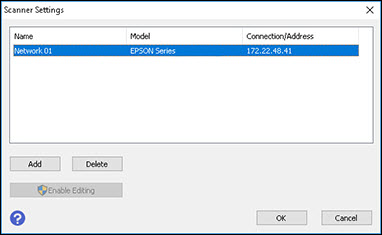
- Click Yes on the error message screen. The Scanner Settings window appears.
- Click Enable Editing or
 and click Yes on the screen that appears. If necessary, enter the administrator password and click OK.
 Note: If you do not see the Enable Editing button, run the Epson Scan 2 Utility as the administrator. Navigate to the shortcut for the Epson Scan 2 Utility, right-click the shortcut, and then click Run as administrator.
- Select your product from the list in the Scanner Settings window and click Delete or - .
Windows
Mac

- Click Add or +. Make sure your product is selected as the Model in the screen that appears.
- Select the IP address for your product.
Note: If you don't know your product's IP address, you can print a network status sheet from your product to obtain it.
- Click Add. Your product appears in the Scanner Settings window.
- Click OK.
Published: Nov 22, 2018
Was this helpful? Thank you for the feedback!